PixVerse has introduced a groundbreaking feature known as the Magic Brush, transforming static images into dynamic experiences. This tutorial will guide you through each step of using the Magic Brush to animate your images effectively.
Step 1: Accessing the Magic Brush Interface
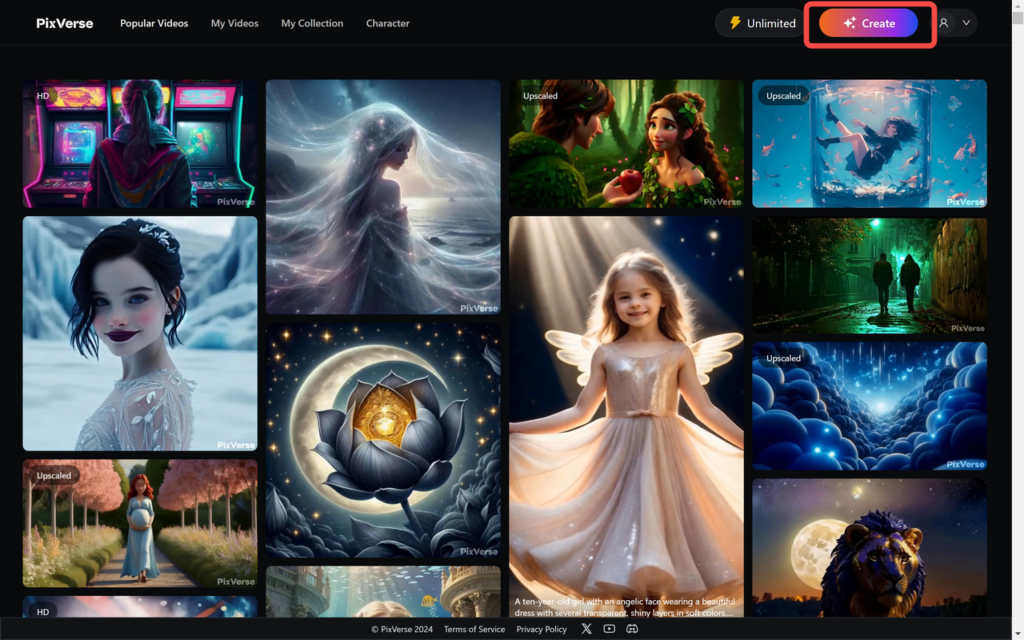
Step 1.1: Launch the Feature
Begin by clicking on the “Create” button located on the main page of the PixVerse platform at https://app.pixverse.ai.
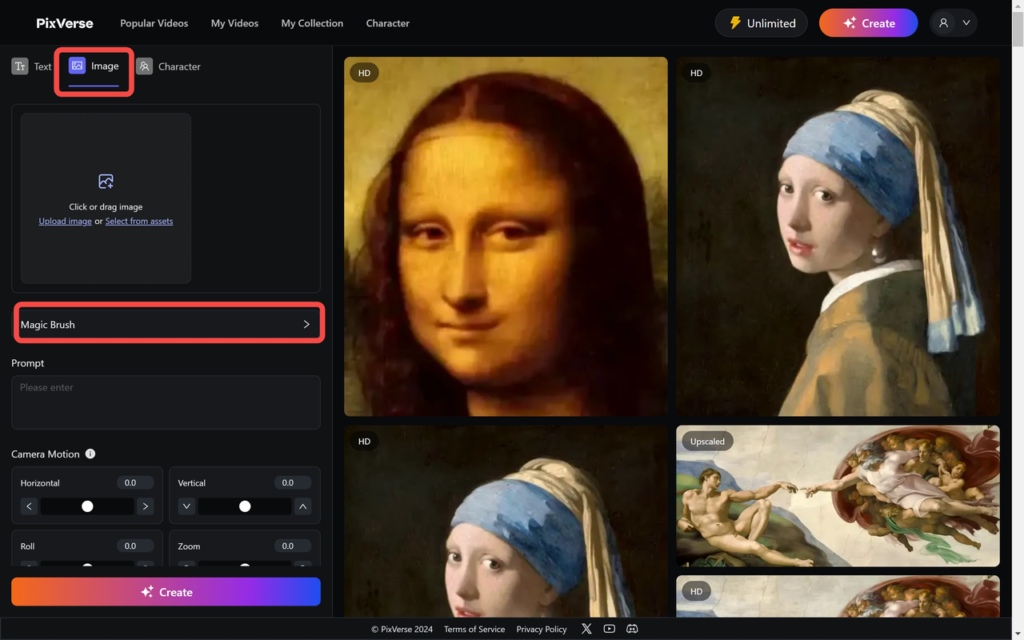
Step 1.2: Select Your Tool
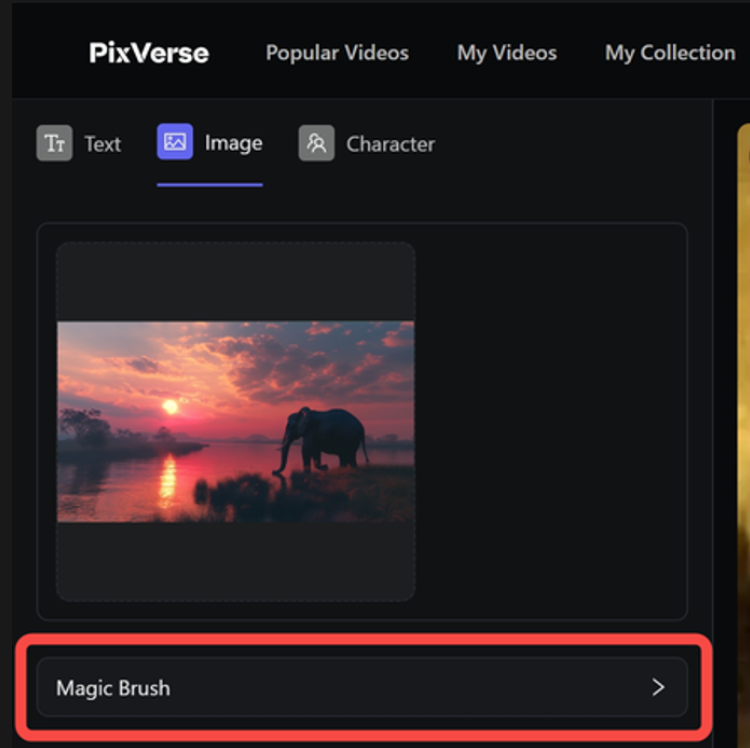
Choose the “Image” option to proceed to the Magic Brush feature.
Step 2: Utilizing the Magic Brush
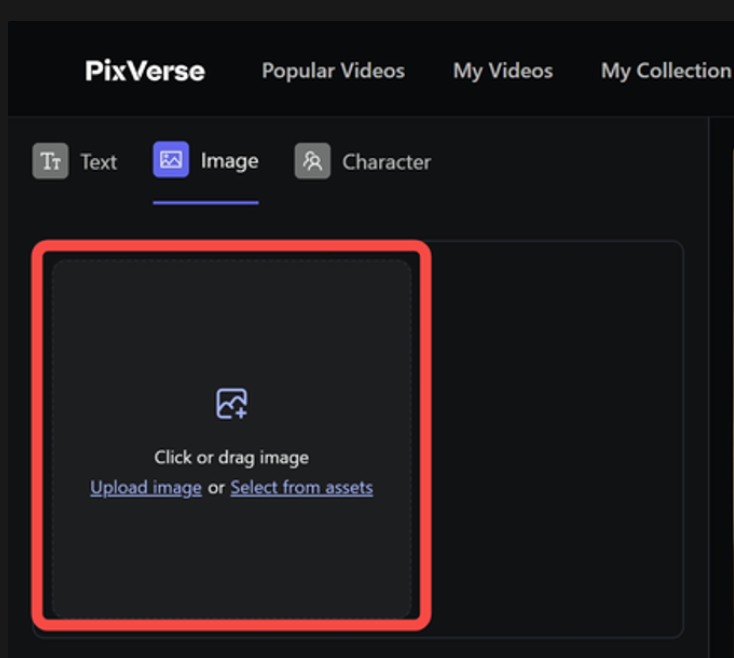
Step 2.1: Upload Your Image
Start by uploading the image you want to animate. This will be the canvas for your Magic Brush creations.
Step 2.2: Enter the Editing Page
Click on the “Magic Brush” option to access the editing tools where the magic happens.
Step 2.3: Select the Magic Brush Area
To specify the area you wish to animate, click on “Select magic brush area.”
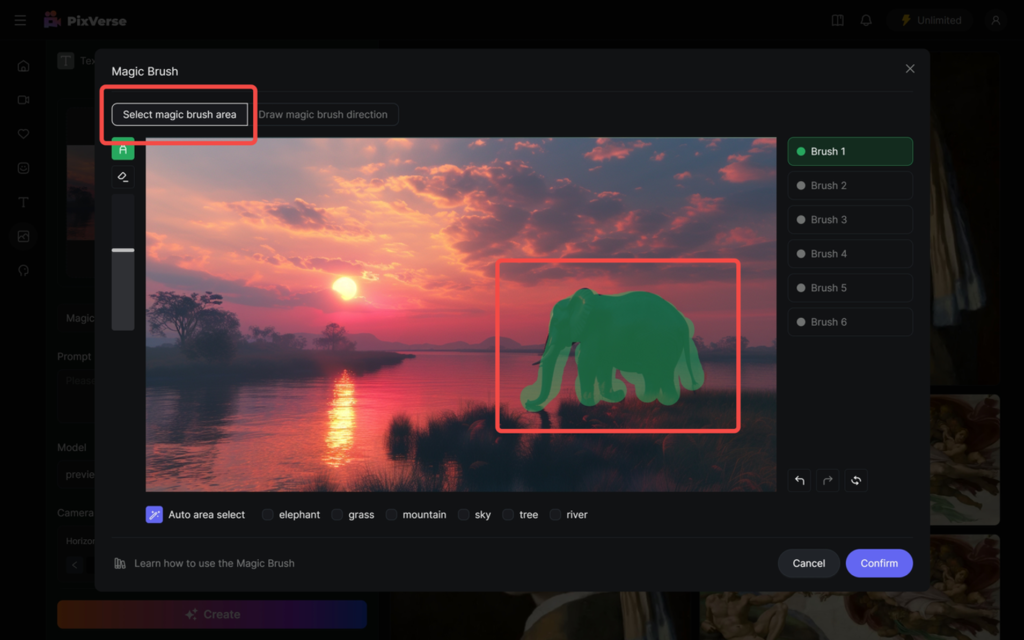
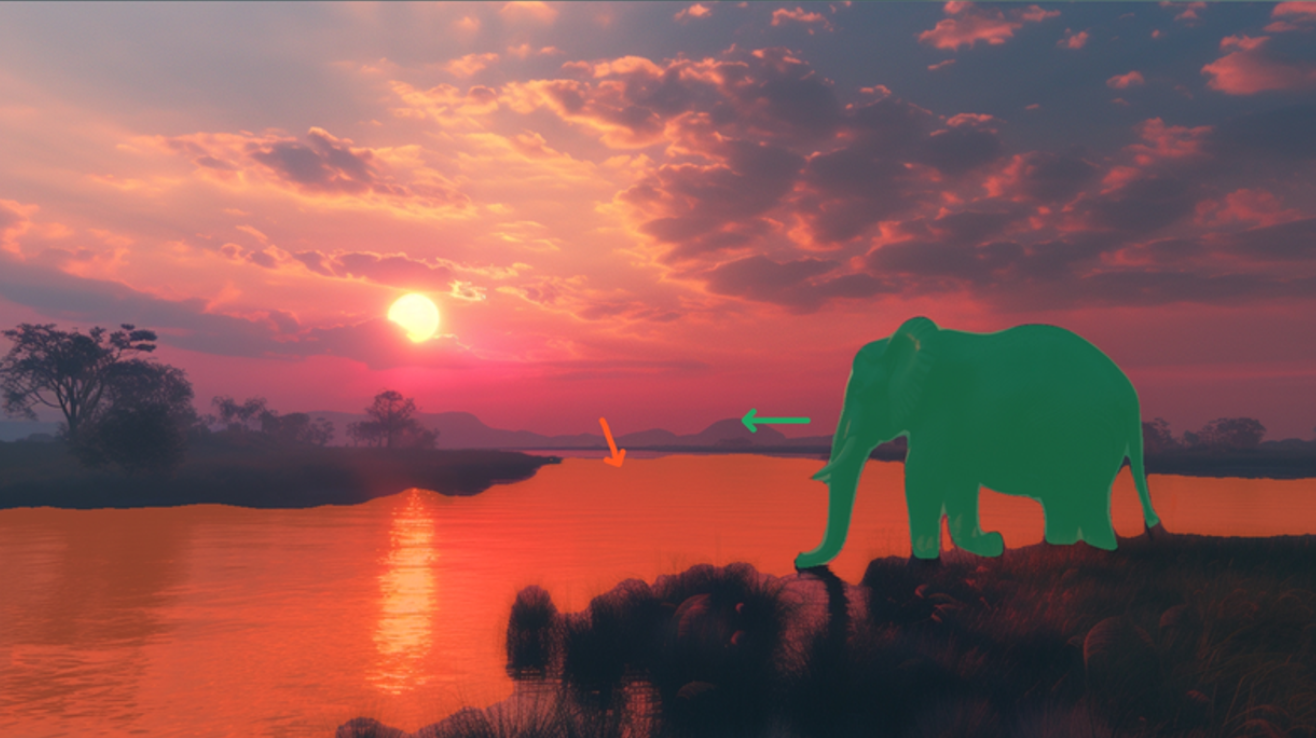
Use the brush tool to paint over the desired region, applying the animation effect directly where you want it.
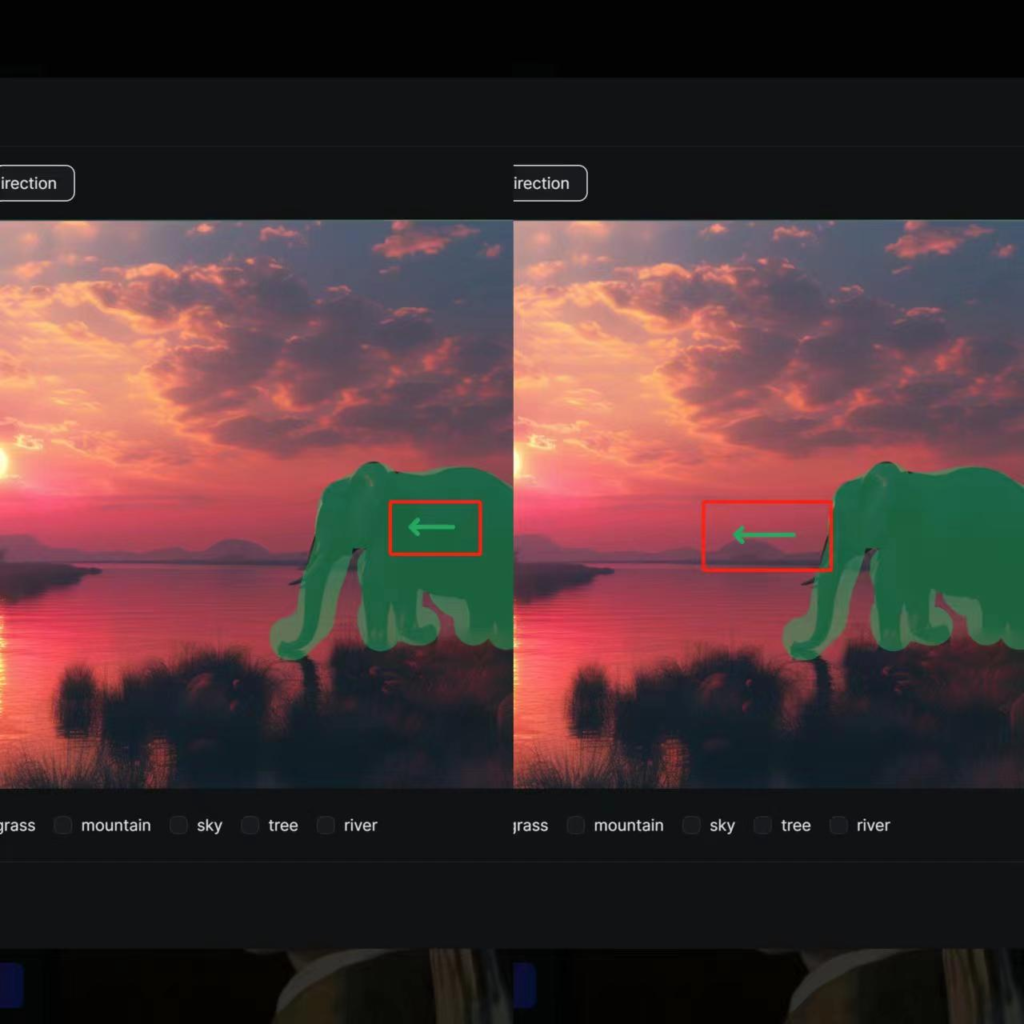
Step 2.4: Define the Motion Trajectory
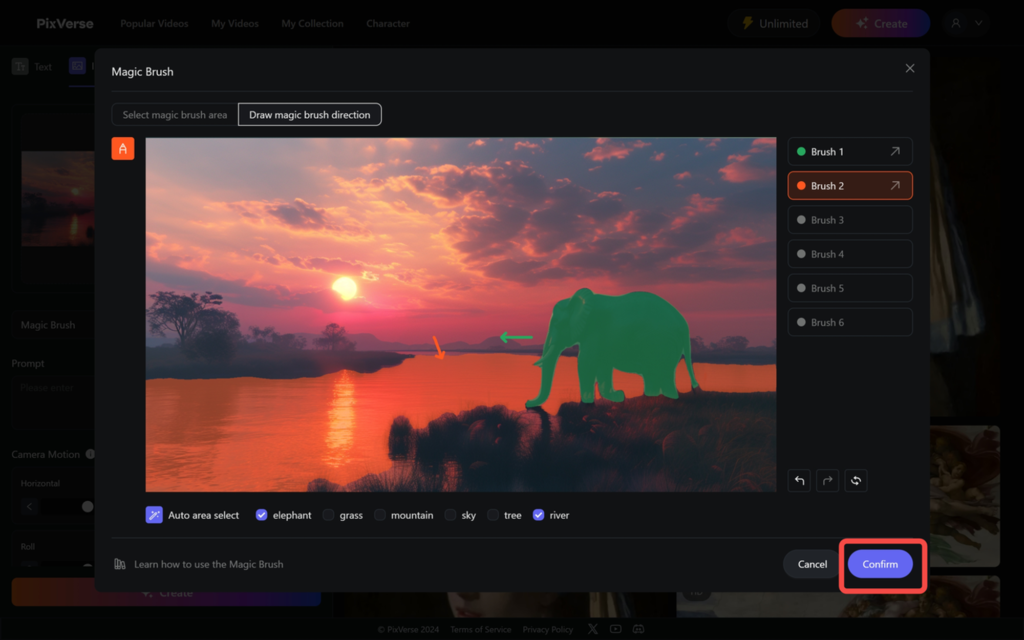
Click on “Draw magic brush direction” and draw the motion paths on your image. Remember, the length of your drawn trajectory will influence the extent of the motion, so plan your strokes accordingly.
Step 2.5: Confirm Your Selections
Once you are satisfied with the areas and directions, click “Confirm” to finalize your choices.
Step 2.6: Generate the Animated Image
Click “Create” and patiently wait for PixVerse to render your animated image.
Step 3: Detailed Functionality of Magic Brush
Step 3.1: Understanding Brushes
Magic Brush allows for up to six distinct motion areas, each requiring its own brush stroke and trajectory to activate the motion effect.
Step 3.2: Adjusting Brush Size
Modify the size of your brush to suit the detail level needed for specific parts of your image.
Step 3.3: Erasing Unwanted Areas
If necessary, use the eraser tool to remove any mistakenly selected areas.
Step 3.4: Auto-Recognition Feature
PixVerse can automatically detect and suggest motion areas for common elements like sky or people. This tool helps streamline the animation process.
Step 3.5: Managing Your Work
Utilize the undo/redo functions for precise editing and the reset feature to start over from scratch if needed.
Step 3.6: Deleting Motion Trajectories
To remove a previously drawn motion path, simply click the delete button.
Frequently Asked Questions
Why aren’t the brushes working?
- Ensure you are using PixVerse on a PC, as the Magic Brush feature is optimized for desktop use.
- Disable any ad or script blockers in your browser settings, which can interfere with the functionality of the Magic Brush.
Conclusion
PixVerse’s Magic Brush is an innovative tool that adds a layer of interactivity and creativity to your digital content. By following this tutorial, you can easily bring your images to life with customized animations, enhancing your visual storytelling capabilities.
Read related articles: